(For a slightly updated version of this guide, please visit it has a protocol hosted by protocols.io at http://dx.doi.org/10.17504/protocols.io.sfuebnw. Huge thanks to @AnitaBroellochs at protocols.io for getting it ready as a protocol!)
With the Fall Creators update to Windows 10 comes the ability for all to install Ubuntu on your Windows 10 machine by simply downloading the app from the official Windows App Store. Rather than using a tool like Cygwin, which replicates a UNIX(-like) experience with some of the same command line tools, Ubuntu on Windows is the full Linux experience. Unlike using Cygwin, you can install bioinformatics software like Salmon or Cufflinks with ease.
In the past, you could try to dual boot your system so that it has two operating systems or run Ubuntu in a virtual machine within Windows, but I think this method is nice and clean. Others will disagree.
What you won't get is the Ubuntu graphical user interface. You are still stuck with running Windows 10. If that is a problem for you, then dual booting or a virtual machine is probably your best option. Instead, what Ubuntu on Windows offers is a simple way to get access to the command line from Ubuntu. Not only does that mean that you can run software designed and compiled to run on Linux, but you can also use all the cool tools of Ubuntu like apt-get to seamlessly install programs, keep them up-to-date, and fetch dependences.
Installing Ubuntu
That's all great, but let's get started: ensure your Windows has the Fall Creators update (version 1709). Then go to the Windows App store and download this:

Once installed, open it up.

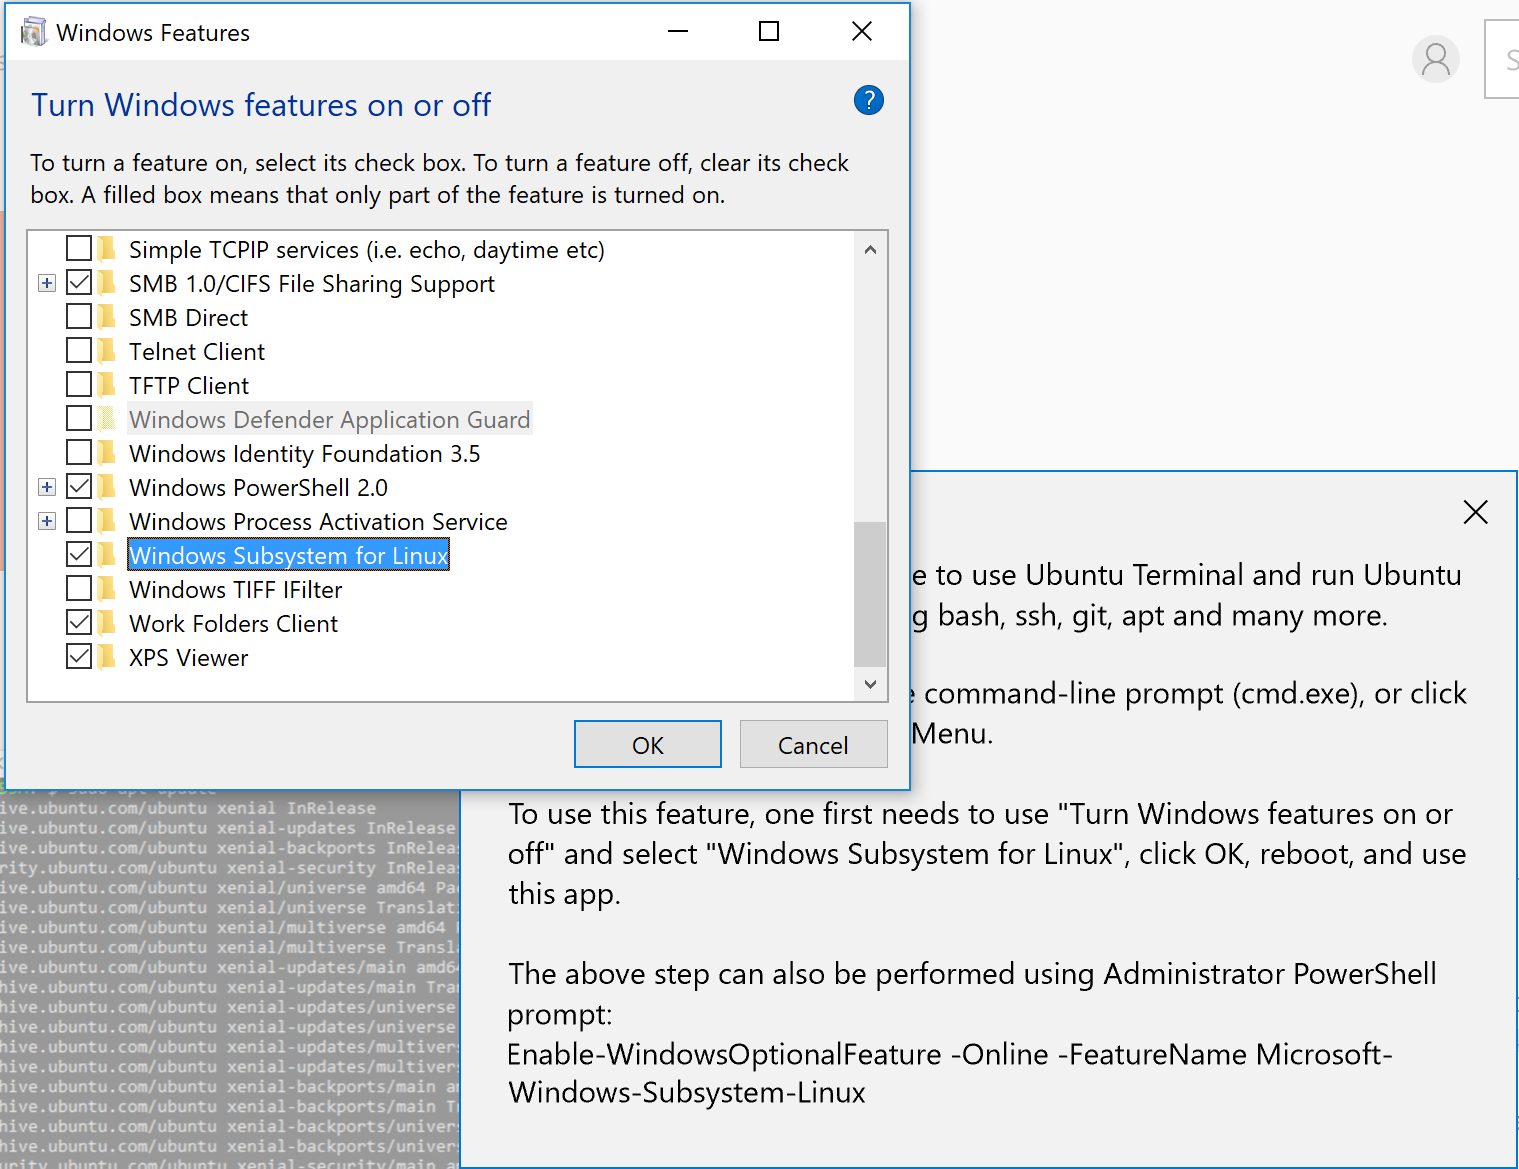
Apparently you need to enable an option in Windows first. Now open the Start menu on Windows and start typing "Windows Features" until a program called Turn Windows Features on or off appears. Click on it and find "Windows Subsystems for Linux, then enable it (tick the box):
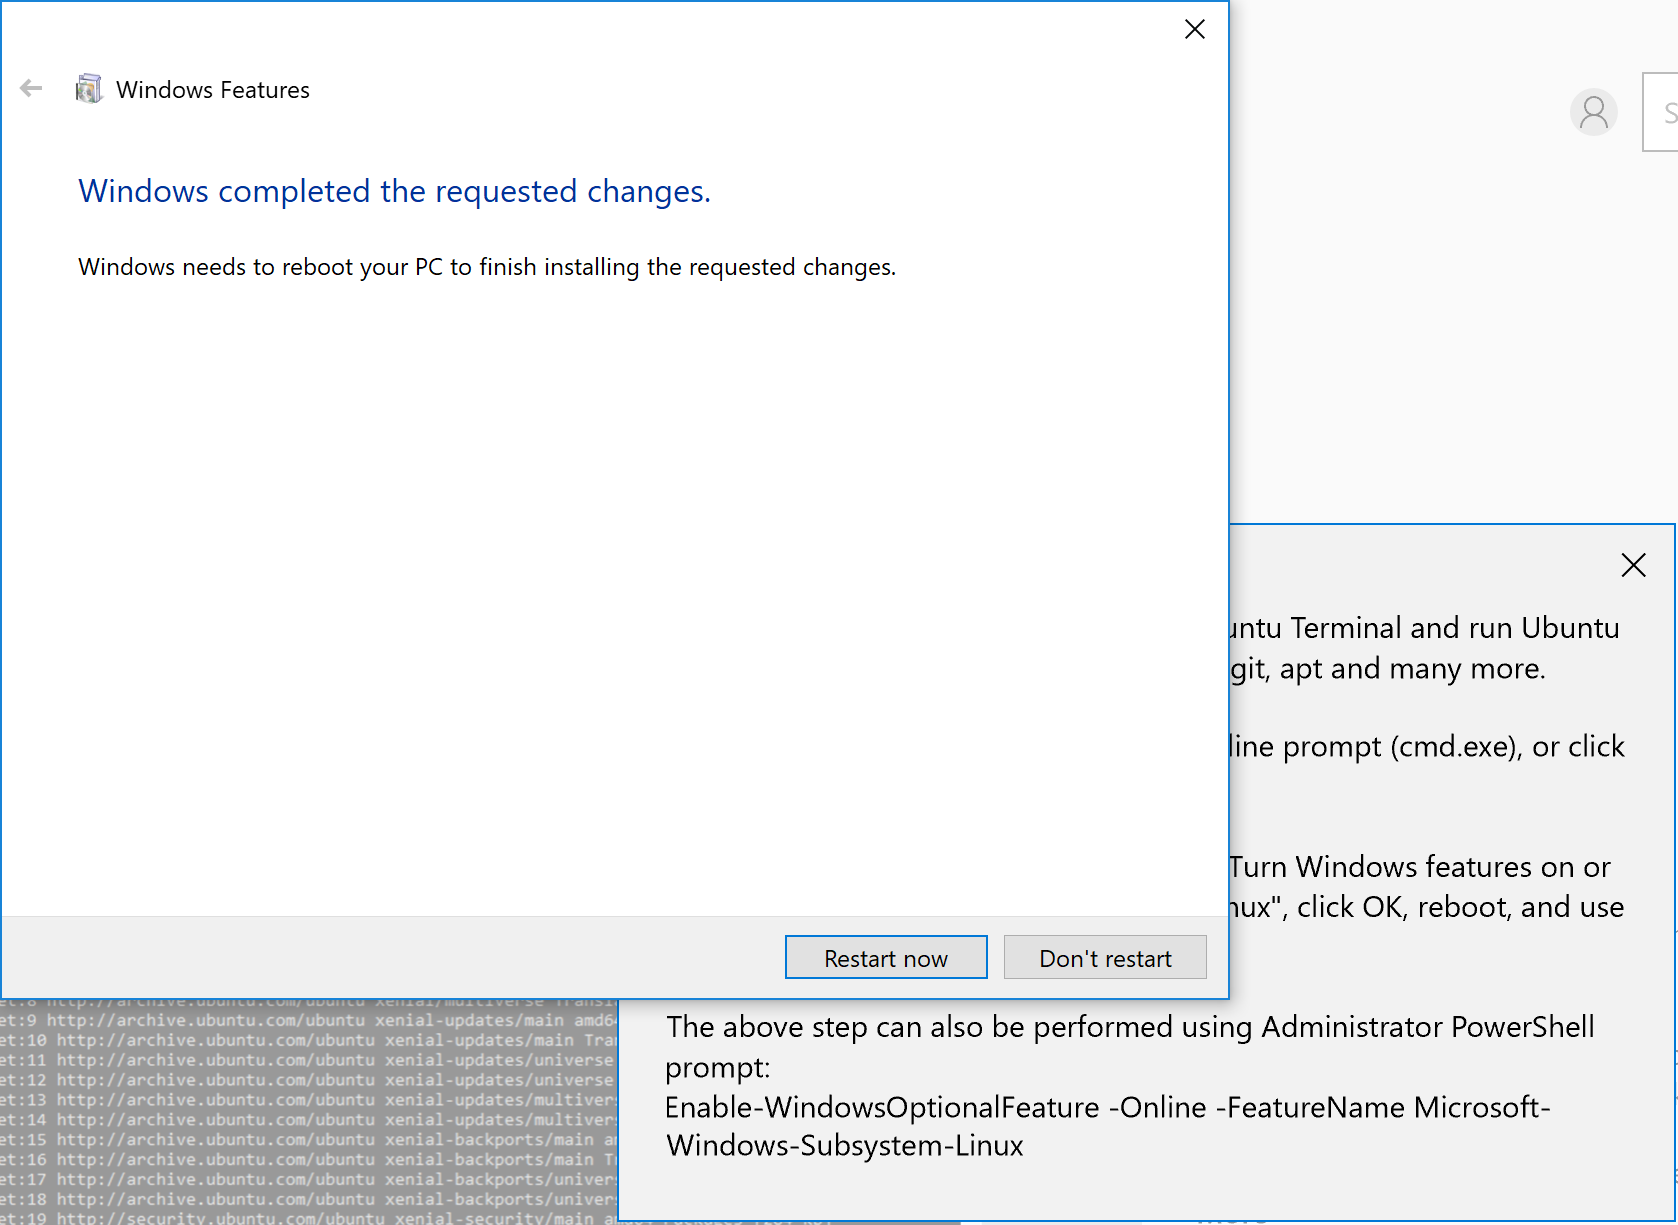
Then you need to restart your PC:
Now try opening Ubuntu again. This time it should take a few moments to install itself:

Once it has finished installing, it will ask for your to select a username and password. These are independent from your Windows username and password. Select a username and passphrase that you will remember and then enter them. You can check the exact version you are using with this command:
$ lsb_release -a

Now you are ready to start using your Ubuntu on Windows. One thing that you might notice is that you cannot do Ctrl+C or Ctrl+P for copy/paste. This is a pain but to copy text that you have highlighted in the Ubuntu app, you can right-click with you mouse. When you have no texted highlighted, right-click will then paste what you have copied.
Right now, you are in a special drive for your Ubuntu files that are separate from your normal storage drive. To access your normal files (what is normally the C drive), go to where they are mounted at:
$ /mnt/c
This is where you wish you had never used spaces in file/folder names, as bash does not handle spaces in filenames well. If this is a big issue for you, I would suggest going back and renaming files/folders you plan to access from the command line.
Now we should update the Ubuntu OS that is running. While my version number did not increase, doing this cleared up an issue I was having with some other software I was trying to install - so I advice that you do update it now with these two commands:
$ sudo apt-get update
$ sudo apt-get upgrade
If you are new to using a UNIX(-like) system, sudo makes you a superuser: you are able to change important things in you system you cannot do normally. It will ask for your password you set Ubuntu up with.
Setting up Python
If like me, you use a lot of Python in your work, it is rather simple to get Python running on Ubuntu. There are many ways to install Python. One way would be to use Ubuntu's apt-get. Another way is to use Conda. Each of these methods installs Python in a different environment, so just be aware. Ubuntu comes with an install of Python 3 out of the box
$ which python3
/usr/bin/python3
$ python3 --version
Python 3.5.2
Given that a lot of the software and code I still use is from Python version 2.7, it is worth having a legacy version around. To install Python 2.7, I suggest using apt-get like so (this will ask for the password that you set Ubuntu up with):
$ sudo apt install python
Now we have Python 2.7 (which you can call with python or python2 as opposed to python3):
$ which python
/usr/bin/python
$ python --version
Python 2.7.12
With advice from here, I then installed a very useful tools for Python on Ubuntu:
$ sudo apt-get install build-essential
$ sudo apt-get install python-dev
$ sudo apt-get install python3-dev
Now for something really important, to install pip. pip is the official package manager for Python modules. It makes installing new packages for Python SOOOO much easier in the long run.
$ sudo apt-get install python-pip
$ sudo apt-get install python3-pip
The issue with pip is that if the Python package you need has dependencies, other programs and packages to work, pip does not handled this well. So if you can use apt-get to get a Python package, that is ideal - the only issue apt-get is that Python package is likely out of date and you might have unfixed bugs. But with pip, this should be easy to fix.
Now to install pandas using apt-get:
$ sudo apt-get install python-pandas
$ sudo apt-get install python3-pandas
By installing pandas with apt-get, we also install many other important Python packages like numpy and matplotlib as dependances, which is a massive timesaver, compared to going after each on individually.
At time of writing, the latest scipy version is 1.0.0. If we look at the version of scipy that has been installed, we can see that we are well out of date:
$ pip show scipy
Name: scipy
Version: 0.17.0
Summary: SciPy: Scientific Library for Python
Home-page: http://www.scipy.org
Author: SciPy Developers
Author-email: scipy-dev@scipy.org
License: BSD
Location: /usr/lib/python2.7/dist-packages
Requires:
So now we can update scipy from version 0.17.0 to 1.0.0 with pip:
$ sudo pip install scipy --upgrade
Now we have the latest version of scipy:
$ pip show scipy
Name: scipy
Version: 1.0.0
Summary: SciPy: Scientific Library for Python
Home-page: https://www.scipy.org
Author: SciPy Developers
Author-email: scipy-dev@python.org
License: BSD
Location: /usr/local/lib/python2.7/dist-packages
Requires: numpy
This is great, but beware that the scipy for Python3 has NOT been updated! So do not forget to do that one too!
$ sudo pip3 install scipy --upgrade
Installing binaries of software for compbio
There are a number of different programs out there for computational biologists that are not going to be downloadable with apt-get. With these, you might need to download the source code and compile the software yourself. But luckily, many developers of these tools put out binaries for systems (Mac, Linux, and sometimes even Windows). A binary is a pre-compiled file that you can call to run the program. So here I will go through the simple task of downloading the latest binary for the RNA-seq quantification software Salmon. But a similar approach should work for other programs available as binaries.
$ cd /usr/local/bin
$ sudo wget https://github.com/COMBINE-lab/salmon/releases/download/v0.8.2/Salmon-0.8.2_linux_x86_64.tar.gz
$ sudo tar -xvzf Salmon-0.8.2_linux_x86_64.tar.gz
To run Salmon, simply enter the path to the binary in the terminal.
$ /usr/local/bin/Salmon-0.8.2_linux_x86_64/bin/salmon
Salmon v0.8.2
Usage: salmon -h|--help or
salmon -v|--version or
salmon -c|--cite or
salmon [--no-version-check] <COMMAND> [-h | options]
Commands:
cite Show salmon citation information
index Create a salmon index
quant Quantify a sample
swim Perform super-secret operation
Now we can run Salmon on our PC (through Ubuntu)! I think that I was the first person to run Kallisto or Salmon on Windows (when Ubuntu for Windows was in development back in 2016).
The issue here is having to remember this long path every time you wanted to run Salmon. You could modify your bashrc to add Salmon to your path. But one advantage of entering the path every time, is that you know exactly which version of Salmon (or any software) you are calling every time you use it.
Hopefully now you can start to perform some of your work on your local (Windows) machine but with the comfort of having all of the tools for Linux at your fingertips.
An alternative guide to Linux on Windows using Conda:
https://github.com/kapsakcj/win10-linux-conda-how-to/blob/master/README.md